satori と sharpを使って、Astro で記事ごとに OG 画像を自動で生成する仕組みを作りました。
以下のように画像が表示されます。
Astro を色々試している。https://t.co/FhdsdfdTRw
— 70_10 (@70_10) February 17, 2023
satori とは
satori とは、HTML/CSS を SVG に変換するツールです。@vercel/og という、動的に OG 画像を生成するライブラリの中で使用されています。
OG 画像が生成されるまでの処理の流れ
- OG 画像用の HTML を作成
- satori で HTML を SVG に変換
- sharp で SVG から PNG に変換
- PNG を 静的ファイルエンドポイントとして配信
実装内容
以下の手順で実際に実装していきます。
- Astro プロジェクトを用意
- 必要なパッケージのインストール
- Astro に React を追加
pages/og/[slug].png.tsを作成getOgImage(title: string)を作成- meta データの設定
0. Astro プロジェクトを用意
0.1 コマンドで Astro プロジェクトを生成
以下のコマンドで、Astro プロジェクトを用意します。
npm create astro@latest
コマンドを実行すると設定を聞かれるので、TypeScript のスタータープロジェクトを選択します。
作成すると以下のような構成のプロジェクトが生成されます。
.
├── README.md
├── astro.config.mjs
├── package-lock.json
├── package.json
├── public
│   └── favicon.svg
├── src
│   ├── components
│   │   └── Card.astro
│   ├── env.d.ts
│   ├── layouts
│   │   └── Layout.astro
│   └── pages
│       └── index.astro
└── tsconfig.json
0.2 ContentCollection の用意
OG 画像を生成するもととなるページ (/posts/[slug])を ContentCollection を使って用意します。
以下の 3 つのファイルを作成します。
---
title: OG画像のサンプルページ
---

# Sample Page

This is sample page.
import { defineCollection, z } from "astro:content";

const postsCollection = defineCollection({
  schema: z.object({
    title: z.string(),
  }),
});

export const collections = {
  posts: postsCollection,
};
---
import { CollectionEntry, getCollection } from "astro:content";

interface Props {
  post: CollectionEntry<"posts">;
}

export async function getStaticPaths() {
  const posts = await getCollection("posts");
  return posts.map((post) => ({
    params: { slug: post.slug },
    props: {
      post,
    },
  }));
}

const { post } = Astro.props;
const { Content } = await post.render();
---

<!DOCTYPE html>
<html lang="ja">
  <head>
    <meta charset="UTF-8" />
  </head>
  <body>
    <h1>{post.data.title}</h1>
    <Content />
  </body>
</html>
1. 必要なパッケージのインストール
OG 画像生成に必要なパッケージ、 satori と sharp をインストールします。
npm install satori sharp
TypeScript を使用しているので、 @types/sharp もインストールします。
npm install -D @types/sharp
2. Astro に React を追加
OG 画像にする HTML を jsx で書くため、Astro に React を導入します。
npx astro add react
3. pages/og/[slug].png.ts を作成
Astro の静的ファイルエンドポイント pages/og/[slug].png.ts を作成します。
OG 画像を生成する、 getOgImage(title: string) の作成は次の工程で行います。
import type { APIContext } from "astro";
import { getCollection, getEntryBySlug } from "astro:content";
import { getOgImage } from "../../components/OgImage";

export async function getStaticPaths() {
  const posts = await getCollection("posts");

  return posts.map((post) => ({
    params: { slug: post.slug },
  }));
}

export async function get({ params }: APIContext) {
  const post = await getEntryBySlug("posts", params.slug);
  const body = await getOgImage(post?.data.title ?? "No title");

  return { body, encoding: "binary" };
}
4. getOgImage(title: string) を作成
getOgImage(title: string) をもつ OgImage.tsx を作成します。getFontData() は satori/font.ts at main · vercel/satori を参考に作成しています。
import satori from "satori";
import sharp from "sharp";

export async function getOgImage(text: string) {
  const fontData = (await getFontData()) as ArrayBuffer;
  const svg = await satori(
    <main
      style={{
        height: "100%",
        width: "100%",
        backgroundColor: "#444",
        color: "#fff",
        padding: "10px",
      }}
    >
      <section>
        <h1 style={{ fontSize: "40px" }}>{text}</h1>
      </section>
    </main>,
    {
      width: 800,
      height: 400,
      fonts: [
        {
          name: "Noto Sans JP",
          data: fontData,
          style: "normal",
        },
      ],
    }
  );

  return await sharp(Buffer.from(svg)).png().toBuffer();
}

async function getFontData() {
  const API = `https://fonts.googleapis.com/css2?family=Noto+Sans+JP:wght@700`;

  const css = await (
    await fetch(API, {
      headers: {
        "User-Agent":
          "Mozilla/5.0 (Macintosh; U; Intel Mac OS X 10_6_8; de-at) AppleWebKit/533.21.1 (KHTML, like Gecko) Version/5.0.5 Safari/533.21.1",
      },
    })
  ).text();

  const resource = css.match(
    /src: url\((.+)\) format\('(opentype|truetype)'\)/
  );

  if (!resource) return;

  return await fetch(resource[1]).then((res) => res.arrayBuffer());
}
5. meta データの設定
astro-seo を使って設定します。
まずは astro-seo をインストールします。
npm install astro-seo
src/pages/posts/[slug].astro に astro-seo を追加します。
---
import { SEO } from "astro-seo";
import { CollectionEntry, getCollection } from "astro:content";

interface Props {
  post: CollectionEntry<"posts">;
}

export async function getStaticPaths() {
  const posts = await getCollection("posts");
  return posts.map((post) => ({
    params: { slug: post.slug },
    props: {
      post,
    },
  }));
}

const { post } = Astro.props;
const { Content } = await post.render();
---

<!DOCTYPE html>
<html lang="ja">
  <head>
    <SEO
      charset="UTF-8"
      openGraph={{
        basic: {
          title: post.data.title,
          type: "article",
          image: new URL(`/og/${post.slug}.png`, Astro.url.origin).toString(),
        },
        image: {
          alt: post.data.title,
        },
      }}
    />
  </head>
  <body>
    <h1>{post.data.title}</h1>
    <Content />
  </body>
</html>
実装の確認
npm run dev でローカル実行をし、http://localhost:3000/posts/sample にアクセスすると以下のように表示されます。
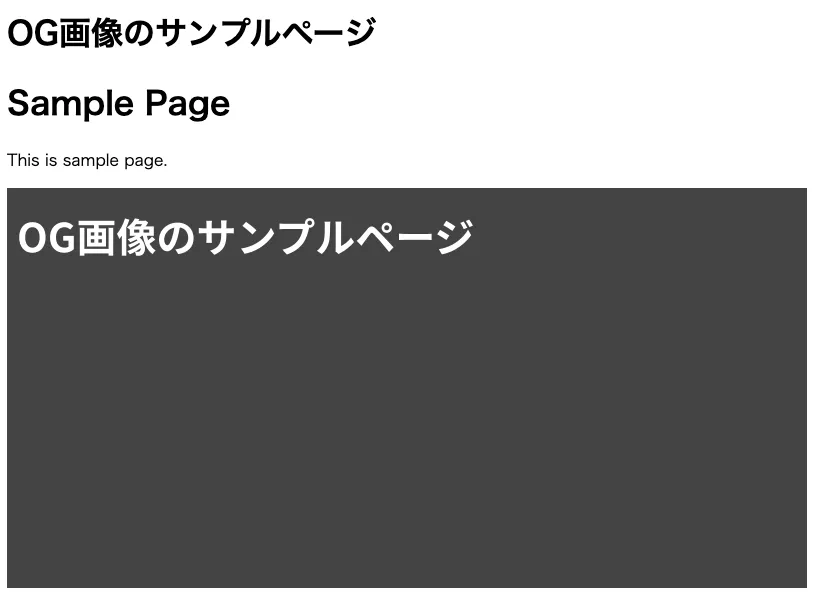 |
|---|
生成された OG 画像は http://localhost:3000/og/sample.png から確認できます。
サンプルアプリ
実際に実装したサンプルアプリはこちらです。
70-10/astro-og-sample